If you’re learning how to grow tomatoes from seed for the first time, the process is more forgiving than it looks: the whole thing comes down to warmth for germination, strong light right after, and a couple of deliberate steps most guides skip. This walks through the full process for how to grow tomatoes from seeds, from sowing to hardening off, including the single mistake that causes more leggy, spindly tomato seedlings than anything else.
When to Start Tomato Seeds
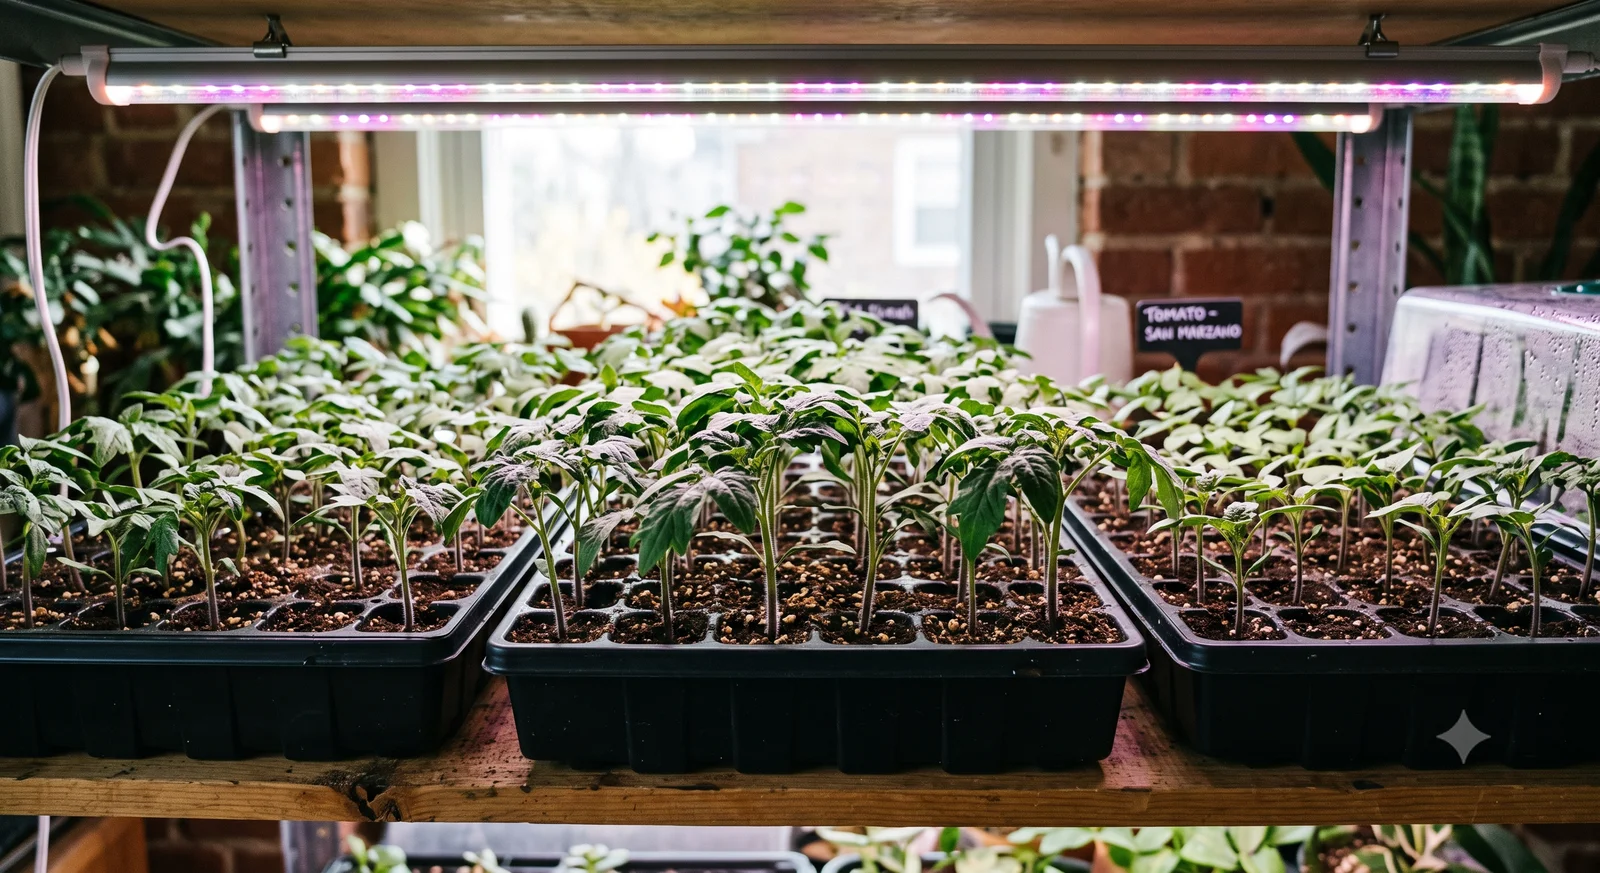
When it comes to how to grow tomatoes from seed indoors, timing is the first decision that matters. HarvestMath’s own Seed Starting Calculator puts tomatoes at 6–8 weeks before your last frost date for starting indoors, with transplant timing 1–2 weeks after that date once the soil and nights have warmed. That’s the figure to plan around here. You’ll see other sources land closer to 5–6 weeks, and some cite an 8–10 week window. The spread comes down to variety (a fast-growing cherry tomato needs less lead time than a big beefsteak) and how large a transplant you want going into the ground.
If you don’t already know your last frost date, our Frost Date Calculator estimates it by ZIP code, and the Seed Starting Calculator turns that into a full personalized schedule (indoor start date, hardening-off window, and transplant date) for tomatoes and everything else in your garden plan.
What You’ll Need
Tomato seeds germinate and grow best with a short, specific list of supplies: skipping any one of these is usually where problems start.
Sterile seed-starting mix, not garden soil. Garden soil compacts in small cells, drains poorly, and can carry fungal spores that cause damping off (more on that below). A bagged seed-starting mix is light, sterile, and holds moisture without staying waterlogged.
Cell trays with drainage holes. Individual cells let you thin and pot up without disturbing neighboring roots, and drainage prevents the soggy bottom that invites rot.
A heat mat. Tomato seeds germinate fastest in warm soil, and a heat mat gets you there reliably regardless of room temperature.
A grow light. Tomato seedlings need strong, close light the moment they germinate: a windowsill alone almost always leaves them leggy. If you’re choosing between light types, our LED vs. Fluorescent Grow Lights guide breaks down which fits a seed-starting setup best.
Sowing the Seeds
Moisten your seed-starting mix before it goes in the tray: dry mix repels water at first and is hard to wet evenly once it’s packed into small cells. Add water gradually and mix by hand until a squeezed handful holds together without dripping: the classic squeeze test, where no water runs out but the mix doesn’t crumble apart either.
Fill each cell to about ¼ inch below the rim, then place 2–3 seeds per cell: this hedges against a seed or two failing to germinate, and you’ll thin down to one seedling per cell later. Cover the seeds lightly, no more than ¼ inch of mix on top, and firm it down gently with a fingertip. Don’t compact the mix hard; tomato seedlings have to push up through it, and dense, packed mix only makes that harder.
Germination: Warmth, Not Light
Tomato seeds don’t need light to germinate. They need warmth. Keep the tray on a heat mat at 70–80°F soil temperature (a mat with a built-in thermostat makes this easy to hold steady), and cover the tray with a humidity dome or plastic wrap to keep the mix from drying out. At that range, tomato seeds typically germinate in 5 to 12 days, though you’ll often see the first sprouts around the one-week mark.
Check the mix moisture at least twice a day while the tray is on the heat mat: heat mats dry out seed-starting mix noticeably faster than room temperature does, and letting it dry out mid-germination can stall or kill emerging seedlings.
How to Germinate Tomato Seeds Faster
Tomatoes germinate readily on their own, so there’s less to troubleshoot here than with slower crops like peppers, but a couple of things do reliably help. Consistent bottom heat from a heat mat held in the 70–80°F range is the biggest lever, since even soil temperature swings of a few degrees can stretch germination out by days. Soaking seeds in room-temperature water for a few hours before sowing can shave a day or so off germination for some gardeners, though it’s optional rather than necessary. Beyond that, tomatoes don’t need tricks: consistent warmth and moisture do essentially all the work, and there’s no real evidence that scarifying seed coats or other unusual methods speed things up meaningfully for a crop that already germinates this easily.
The Heat Mat Mistake Almost Everyone Makes
This is the single biggest mistake in tomato seed starting, and it’s easy to make because it feels counterintuitive: the moment you see the first sprout break the surface, take the tray off the heat mat and get it under strong light immediately: the same day, ideally the same hour.
Leaving newly germinated seedlings on a heat mat past that point pushes them to stretch upward fast, chasing light they aren’t getting enough of, which produces the thin, pale, leggy seedlings that flop over and rarely fully recover. It’s a race between heat-driven stem elongation and the seedling settling into steady growth under adequate light, and the heat mat wins if you leave it running too long.
After moving the tray off the mat, drop the ambient room temperature to roughly 65°F if you can. Cooler air after germination keeps growth compact and sturdy instead of stretched, and it’s a more controllable variable than most people assume: a slightly cool room, not a heated one, is what a tomato seedling wants at this stage.
Cotyledons vs. True Leaves
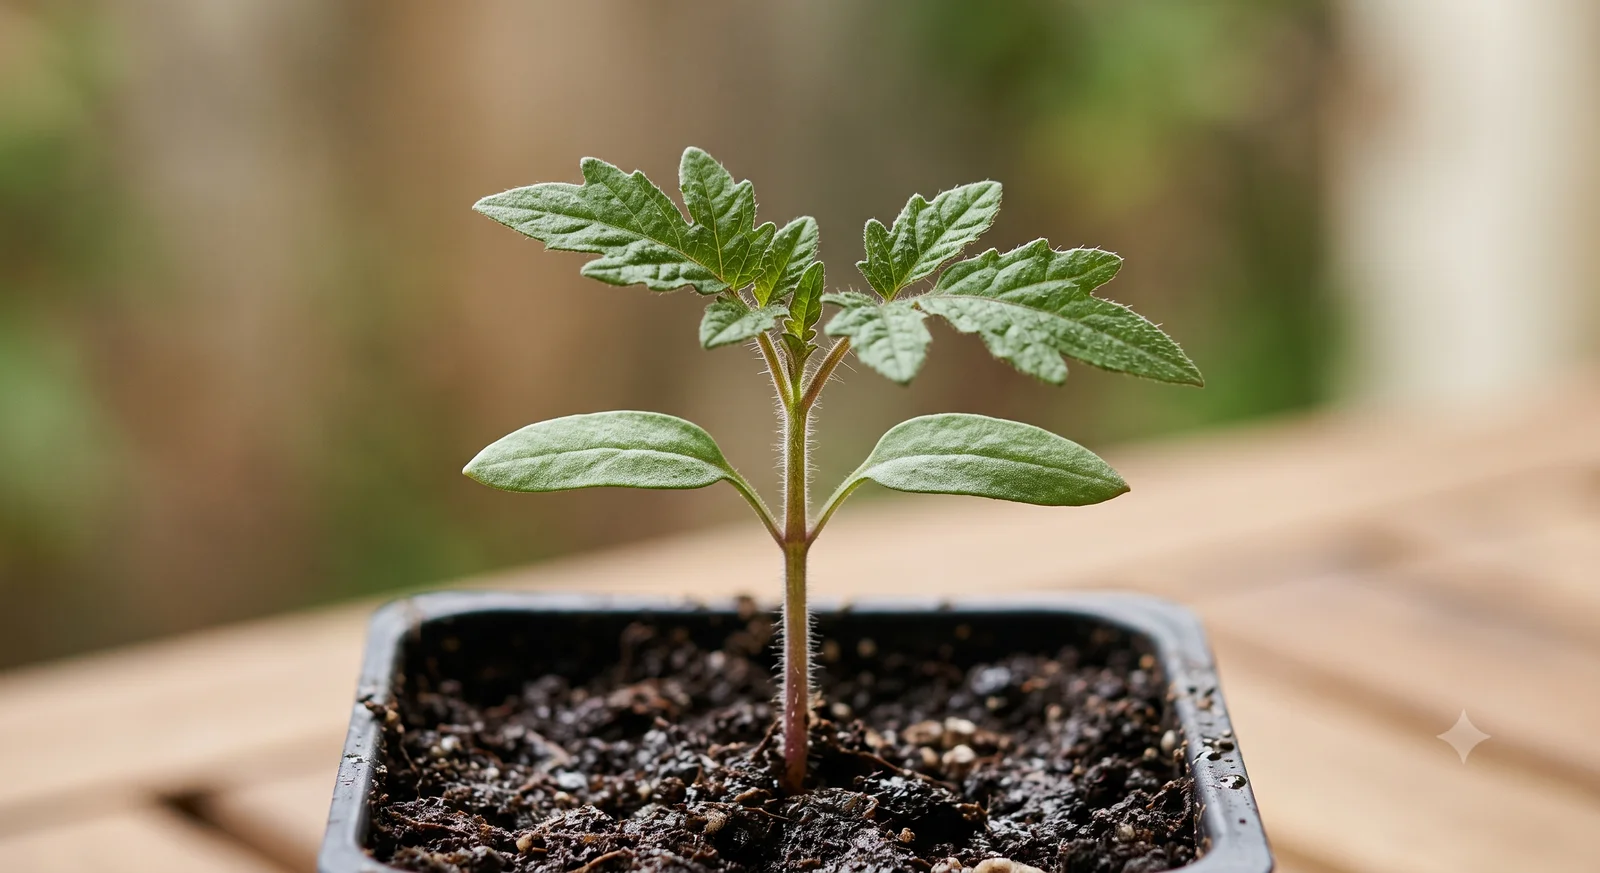
The first two leaves a tomato seedling produces are cotyledons: seed leaves that were already packed inside the seed, smooth-edged and oval rather than the jagged, fuzzy shape of an actual tomato leaf. The next leaves to emerge are true leaves, and they’re the first ones that actually look like tomato foliage.
Once you’ve got a couple of true leaves, thin each cell down to its strongest single seedling. Snip the extras off at the soil line with small scissors rather than pulling them: pulling risks disturbing the roots of the seedling you’re keeping, since roots in adjacent cells are often more tangled together than they look. At the true-leaf stage, you can also start a diluted liquid fertilizer (roughly quarter- to half-strength): the seed supplied all the nutrition the seedling needed up to this point, and that reserve is used up by now.
Potting Up
When a seedling has two sets of true leaves and stands 3–4 inches tall, it’s ready to move out of its cell and into a 4-inch pot. Tomatoes are one of the few vegetables where you actually want to bury the stem deeper at this stage: plant it up to its lowest set of leaves, not just at the same soil line it was growing at before. The buried section of stem, including the fine hairs visible along it, will grow into roots, giving the plant a sturdier root system by the time it’s ready to go in the ground. (This is specific to tomatoes: peppers don’t root the same way from a buried stem, so if you’re starting both, see our How to Grow Peppers from Seed guide for why peppers get planted at the same depth instead.)
Preventing Damping Off and Fungal Problems
Damping off is the fungal problem that kills more seedling trays than anything else: seeds that never emerge, or seedlings that look fine one day and are collapsed at the soil line the next. It thrives in cool, overly wet conditions, which makes seed starting an easy environment to trigger it in if you’re not careful.
A few habits go a long way toward preventing it. Water from below by setting the tray in a shallow reservoir rather than watering from above: wet foliage and a constantly damp surface both favor fungal growth. Run a small fan on low nearby; light air movement keeps the surface of the mix drying between waterings and strengthens seedling stems as a side benefit. And don’t let the surface stay soggy: check it before each watering rather than watering on a fixed schedule, and let it dry slightly between waterings instead of keeping it saturated.
Hardening Off and Transplanting
Hardening off is the gradual process of getting an indoor-grown seedling used to outdoor conditions (direct sun, wind, temperature swings) before it goes in the ground permanently. Skipping it, or rushing it, tends to shock the plant with sunscald or wind damage right when you want it growing, not recovering.
Start 7–10 days before your planting date. On day one, set seedlings outside in a sheltered, shaded spot for just 1–2 hours, then bring them back in. Each day after, increase both the sun exposure and the time outside a little. By the end of the week, they should be able to handle a full day outside, including a few hours of direct sun, before you leave them out overnight.
At transplant time, bury tomato seedlings deep again, just like when you potted them up: burying up to the lowest set of leaves gives the plant an even sturdier root system once it’s in the ground. For the exact in-row and between-row figures by support method (staked, caged, or sprawling), see our Tomato Plant Spacing guide. Once you know your bed’s dimensions, our Plant Spacing Calculator works out how many tomato plants actually fit with proper spacing, and our Vegetable Yield Calculator estimates how much fruit to expect from however many plants you end up with. If you’re transplanting into a raised bed specifically, our Growing Tomatoes in Raised Beds guide picks up exactly where this one leaves off: bed depth, tighter raised-bed spacing, soil mix, and why raised beds are more prone to blossom end rot.
Growing Specific Varieties from Seed
Tomato varieties differ enough in seed-starting behavior and days to maturity that it’s worth knowing your type before you sow. If you want a rolling harvest instead of one big flush, our Succession Planting guide covers staggering cherry, paste, and beefsteak varieties from a single planting day.
Cherry Tomatoes
Cherry tomatoes germinate reliably and grow fast, often reaching transplant size on the shorter end of the 6–8 week window. They’re a forgiving first variety to start from seed if you’re new to the process, and they tend to produce the earliest ripe fruit of any tomato type once transplanted.
Roma and Paste Tomatoes
Roma and other paste varieties grow more compact than sprawling slicing tomatoes, which makes them well-suited to tighter spacing if you’re working a small bed. They mature mid-season relative to cherry types, and their lower water content makes them the standard choice for sauce and canning.
Beefsteak Tomatoes
Beefsteak varieties are the slowest to mature of the four here, and they benefit from the full 8 weeks on the high end of the starting window since they need a larger root system to support their fruit size. Give them slightly more room in the cell tray and pot up promptly once they hit two sets of true leaves: a rootbound beefsteak seedling stalls out more noticeably than a smaller variety.
Heirloom Tomatoes
Heirlooms cover a wide range of days-to-maturity and vigor depending on the specific variety, so check the seed packet rather than assuming: some heirlooms behave like a fast cherry type, others like a slow beefsteak. They’re also generally less disease-resistant than modern hybrids bred for it, which makes the damping-off precautions above worth taking seriously if you’re starting heirlooms.
Once transplants are in the ground and growing, leaf symptoms are the next thing worth watching for. If leaves start yellowing later in the season, our Why Are My Tomato Leaves Turning Yellow? guide walks through diagnosing the cause by symptom, from normal bottom-of-plant aging to early blight and septoria leaf spot.
Free book · 23 pages, PDF
Growing Tomatoes from Seed FAQ
How long do tomatoes take to grow from seed?
From sowing to harvest, expect roughly 3 to 4.5 months total: 6–8 weeks indoors before transplant, then another 60–85 days to maturity after that, depending on the variety. Cherry tomatoes land on the shorter end of that range; beefsteaks and other large slicing varieties take longer.
How long do tomato seeds take to germinate?
Tomato seeds typically germinate in 5 to 12 days at a soil temperature of 70–80°F, with most sprouting around the one-week mark. Cooler soil slows germination substantially and can push it out closer to two weeks or longer.
Can you grow tomatoes from a store-bought tomato?
Yes, in most cases. Scoop out the seeds, rinse off the gel coating, let them dry fully, and they'll germinate like any other tomato seed. The one catch is that if the tomato was a hybrid variety, the seedling won't reliably grow true to the parent plant's traits, so results can vary.
Should you soak tomato seeds before planting?
It's optional, not necessary. Soaking tomato seeds for a few hours before sowing can speed up germination slightly, but tomato seeds germinate reliably without it as long as the mix stays consistently moist and warm.
Can I plant tomato seeds directly in the ground?
You can in warm climates with a long growing season, but most gardeners get better results starting indoors, since direct-sown tomatoes lose weeks of the growing season waiting for outdoor soil to warm enough for germination. Starting indoors on the schedule above gives seedlings a multi-week head start. Not every crop needs this: lettuce, for example, is genuinely fine direct-sown; see our How to Grow Lettuce from Seed guide for a cool-season crop that works the opposite way tomatoes do. Carrots take it further still: they can't be transplanted at all, since disturbing the root ruins it; see our How to Grow Carrots from Seed guide for that direct-sow-only case. Cucumbers land in between: they genuinely work either way; see our How to Grow Cucumbers from Seed guide for that more flexible case. Beans are direct-sow only too, like carrots. See our How to Grow Beans from Seed guide, which also corrects the popular myth about beans fixing your soil's nitrogen.
Why are my tomato seedlings tall and spindly?
This is almost always a light problem, not a watering or nutrition problem: leggy seedlings are stretching toward light that isn't strong or close enough, most commonly from staying on a heat mat too long after germination or sitting too far from a grow light. Moving seedlings under closer, stronger light and lowering ambient temperature after germination is the fix; growth that's already stretched can't fully reverse, but potting up deeper helps compensate.
Sources & further reading
For more on tomato timing, sowing depth, and transplanting technique, see University of Minnesota Extension’s guide to growing tomatoes in home gardens. For damping off and other seedling and garden disorders, see Clemson HGIC’s Tomato Diseases & Disorders factsheet. For more on how we source and review the facts behind every calculator and guide on this site, see our methodology page. And for more on spacing, timing, and companion planting across the whole garden, see our complete guide to spacing and planting.