Learning how to build a rainwater collection system is less about the barrel and more about everything connected to it. There’s more than one way to approach how to make a rainwater collection system, but skipping the connection or the overflow is what turns a good idea into a bucket that eventually spills over and sends water straight down your foundation. Get the connection and overflow right, and the barrel itself is the easy part.
What Is a Rainwater Collection System?
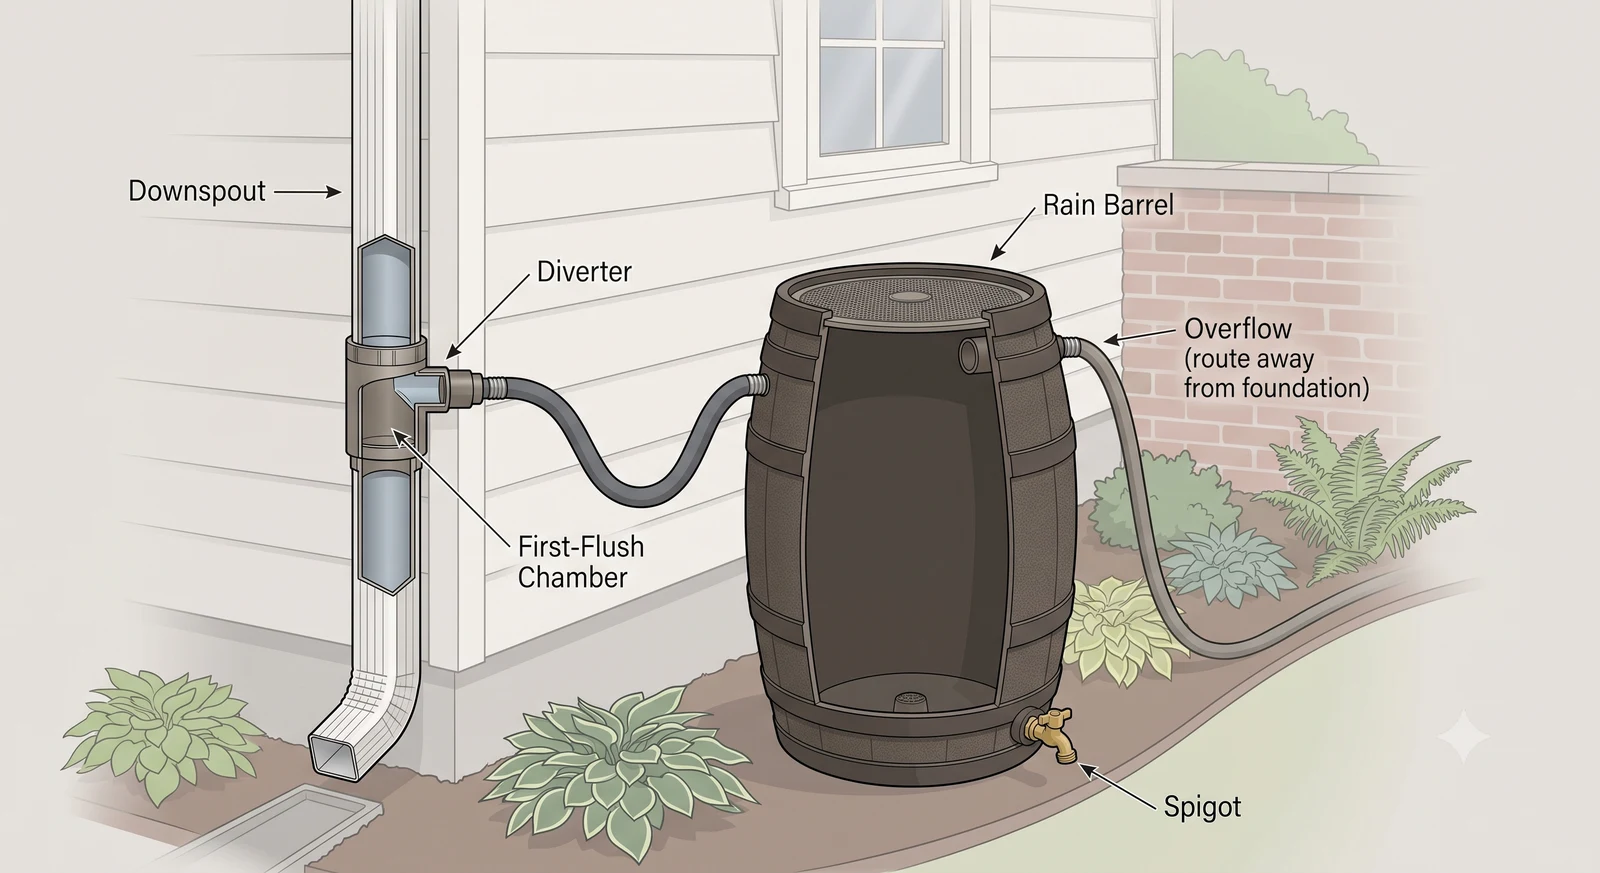
A rainwater collection system is a setup that captures roof runoff from a downspout, filters out debris, and stores it in a barrel or tank for later use in the garden, with an overflow path for whatever the barrel can’t hold. At garden scale, that’s a single 50–80 gallon barrel connected to one downspout, a different, much simpler project than a whole-house potable or off-grid system, which involves pumps, tank sizing for daily household demand, and its own regulatory requirements. This guide covers the garden-scale version: what you need, how the pieces connect, and the steps people skip that cause the most problems.
In practice, learning how to set up a rainwater collection system comes down to five components: downspout connection, filtering, storage, overflow, and a winterizing routine, each covered below in the order you’ll actually install them.
Choosing a Location
Start with the downspout, not the barrel: you’re working around a fixed point, and moving water sideways to a barrel adds cost and failure points for little benefit. Pick a downspout that’s already close to where you’ll actually use the water, so you’re not hauling full watering cans across the yard. The base matters just as much as the spot: a full 50-gallon barrel weighs over 400 pounds, enough to sink unevenly into soft ground or tip on a slope. Set it on a stable, level base: pavers, a concrete paver pad, or a compacted gravel bed all work: and give yourself enough clearance underneath to fit a watering can or bucket under the spigot.
Before you buy, size the system to your roof and rainfall rather than guessing at barrel count: our Rain Barrel Calculator works out how much rainwater you can actually collect from a given roof area and rainfall amount, plus the spigot water pressure you’ll get at a given barrel height, both worth knowing before you buy one barrel or three.
Connecting to Your Downspout
There are two real ways to connect a barrel to a downspout, and they trade off cost against convenience. Direct-cut means cutting the downspout at barrel height and routing it straight into the barrel’s inlet: it’s the cheapest option since it needs no extra parts, but there’s no built-in way to bypass the barrel once it’s full, and disconnecting for winter means cutting or refitting the downspout again. A rain barrel diverter kit ($15–$40) is the more practical choice for most setups: it fits inline on the downspout, automatically routes water past the barrel once it’s full instead of backing up, and pops apart in seconds for winterizing: no tools, no cutting. Unless the cost difference matters, a rain barrel diverter is worth it for the disconnect alone. Some suppliers list the same part as a rain barrel downspout diverter rather than a “diverter kit”: same product, different name.
Filtering the Water
Two different filtering jobs get lumped together under “filtering,” and a full system uses both. A leaf eater or debris excluder screen sits over the barrel’s inlet or across the diverter opening and physically blocks leaves, twigs, and grit from ever entering the barrel: this matters most under trees or during fall leaf drop, and without it you’re fishing debris out of the barrel or clogging the spigot. A first-flush diverter does something different: it captures the first 1–2 gallons of each rain event (the runoff that carries the roof’s accumulated dust, pollen, and bird droppings) and diverts just that portion away before letting cleaner water through to the barrel. A leaf screen alone stops solids; a first-flush diverter is what actually improves water quality. If your roof sheds a lot of debris or you want cleaner water for edibles, use both.
Don’t Skip the Overflow
This is the single most commonly skipped step, and skipping it is the most common cause of problems with a rain barrel system. Every barrel fills eventually, and without a planned overflow path, that excess water finds its own way out, usually pooling right at the base of the barrel, next to your foundation. Connect an overflow hose to the barrel’s overflow port and route it at least 4–6 feet away from the foundation, angled downhill so gravity does the work. If you want more storage without a bigger barrel, most barrels support daisy-chaining: connect a second barrel’s inlet to the first barrel’s overflow port, so the first barrel fills before the second one starts collecting. The overflow on the last barrel in the chain still needs to go somewhere well clear of the house.
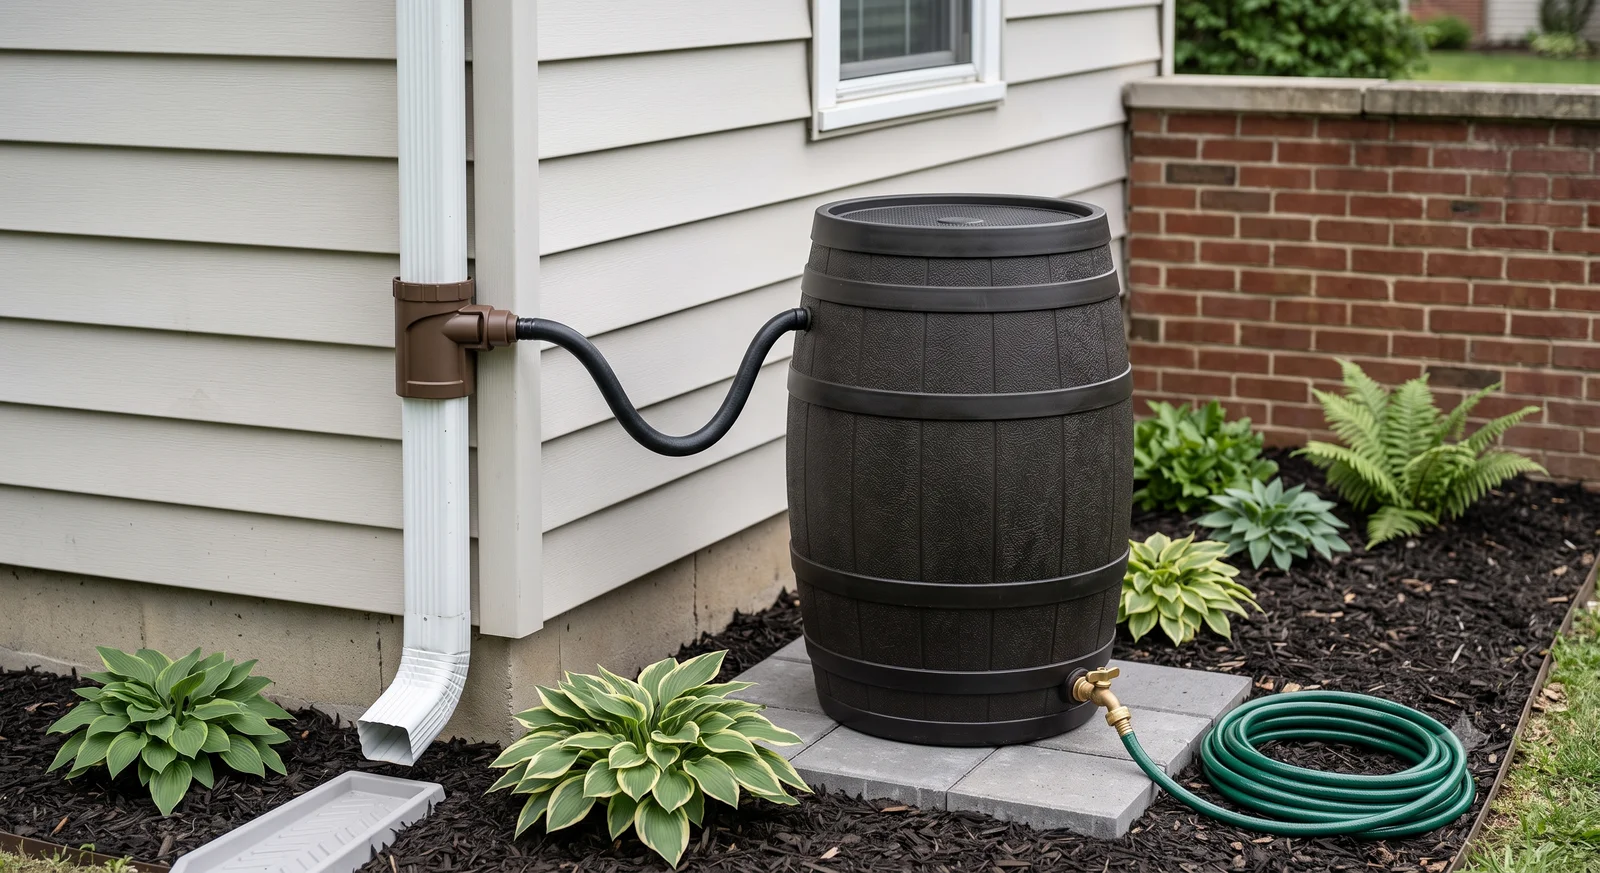
A completed setup: diverter hose from the downspout, barrel on a level paver base, hose on the spigot.
Using Your Collected Water
Collected rainwater is genuinely good for garden use: it’s naturally soft and slightly acidic, which many plants prefer over treated tap water. It is not potable: roof runoff can pick up contaminants that plain filtering doesn’t remove, so it isn’t safe to drink without proper treatment. For edible plants, apply it at soil level rather than overhead, especially on leafy greens that get eaten raw and don’t get cooked before they’re rinsed and served. A drip line or soaker hose run off the barrel’s spigot delivers water right at the soil line instead of on the leaves. Our Drip Irrigation Calculator works out the run time and total water delivered for whatever emitter setup you’re running off the barrel.
Do You Need a Pump?
A rain barrel has no pump built in: whatever pressure comes out of the spigot is purely gravity, roughly 0.433 PSI for every foot of water height above the outlet. For most garden-scale uses, that’s genuinely enough: filling a watering can, running a soaker hose, or a gravity-fed drip line with low-flow emitters all work fine off a barrel elevated a couple of feet on a stand. Our Rain Barrel Calculator works out the exact PSI for your barrel height if you want the number rather than a guess.
A rain barrel pump becomes worth adding once gravity alone isn’t cutting it, typically when you’re running standard drip irrigation emitters that want more consistent pressure than a barrel can reliably deliver on its own, watering something uphill or far from the barrel, or daisy-chaining a longer line than gravity can push water through. A small inline booster pump solves this without needing to elevate the barrel higher than is practical. Before deciding, size the actual run first: our Drip Irrigation Calculator works out the flow rate and run time for your emitter setup, which tells you whether gravity is actually the bottleneck or whether the barrel height alone is enough.
Winterizing Your System
Disconnect and fully drain the system before the first hard freeze: water left in a barrel or in fittings expands as it freezes and cracks plastic barrels, hoses, and diverter parts, turning a one-time job into a repair bill every spring. Disconnect the diverter or downspout connection, drain the barrel completely through the spigot, and store it upside down over winter so any residual water and precipitation drain out rather than collecting inside. Reconnect after your last frost date, once the freeze risk has actually passed rather than on a guess. Our Frost Date Calculator gives you that date range by zone so you’re not reconnecting too early.
Free book · 23 pages, PDF
Rainwater Collection System FAQ
What is a rainwater collection system?
A rainwater collection system captures roof runoff from a downspout, filters out debris, and stores it in a barrel for later garden use, with an overflow path built in for excess. At garden scale, that's typically a single barrel connected to one downspout, simpler and far less regulated than a whole-house potable system.
How do rainwater collection systems work?
Rain hits the roof, flows down the gutter into the downspout, and gets diverted into a barrel through either a direct cut or a diverter kit. A screen or first-flush diverter filters out debris and the dirtiest initial runoff, the barrel stores the rest, and an overflow port routes anything beyond the barrel's capacity safely away from the foundation.
How much does a rainwater collection system cost?
A basic garden-scale setup runs roughly $50–$150: a rain barrel ($40–$100), a diverter kit ($15–$40), and an overflow hose. Costs go up with additional barrels for daisy-chaining, a first-flush diverter, or a raised stand to increase spigot pressure, all optional add-ons rather than requirements.
How do I install a rainwater collection system?
Set a level, stable base near your downspout, install a diverter kit (or direct-cut the downspout) into the barrel's inlet, add a debris screen and optional first-flush diverter, then connect an overflow hose routed 4–6 feet downhill from the foundation. Disconnect and drain the whole system before winter.
Sources & further reading
The installation steps above follow Fulton County, Georgia’s official Rain Barrel Diverter Kit Installation guide. For more on how we source and review the facts and formulas behind every calculator and guide on this site, see our methodology page. And for the full picture on collecting and delivering water efficiently in your garden, see our complete guide to watering and irrigation.